Building your website using R {blogdown}
A concise step-by-step guide
 Image credit: Xie, Thomas, Hill 2018
Table of Contents
I finally decided to bite the bullet and create my own website using
{blogdown}. If you’re like me, you’ve already seen many inspiring examples of websites created with blogdown (for example, the webpages of Julia Silge, Silvia Canelón, and Iván Mauricio Cely Toro), but the process of creating it sounds slightly overwhelming. 😰
If so, this post is for you: I’ll walk you through my step-by-step process of building a site using blogdown and the Wowchemy theme for Hugo and deploying it with Netlify. I largely followed the process documented here by Alison Hill. The good news: we’ll mostly build and customize the website from the comfort of RStudio. 🥳
My goal is to write a concise step-by-step guide without having you worry too much about what’s happening behind the scenes. For a much more comprehensive guide, please check out Alison’s blog.
Prerequisites
Install a recent version of R and RStudio
Create a GitHub account
Connect RStudio to GitHub (preferably with HTTPS)
Sign up with Netlify using your GitHub account
Resources for getting started with GitHub
⚒︎ Happy Git and GitHub for the useR
⚒︎ The Turing Way Guide for Collaboration
⚒︎ Start Your Lab guide 1
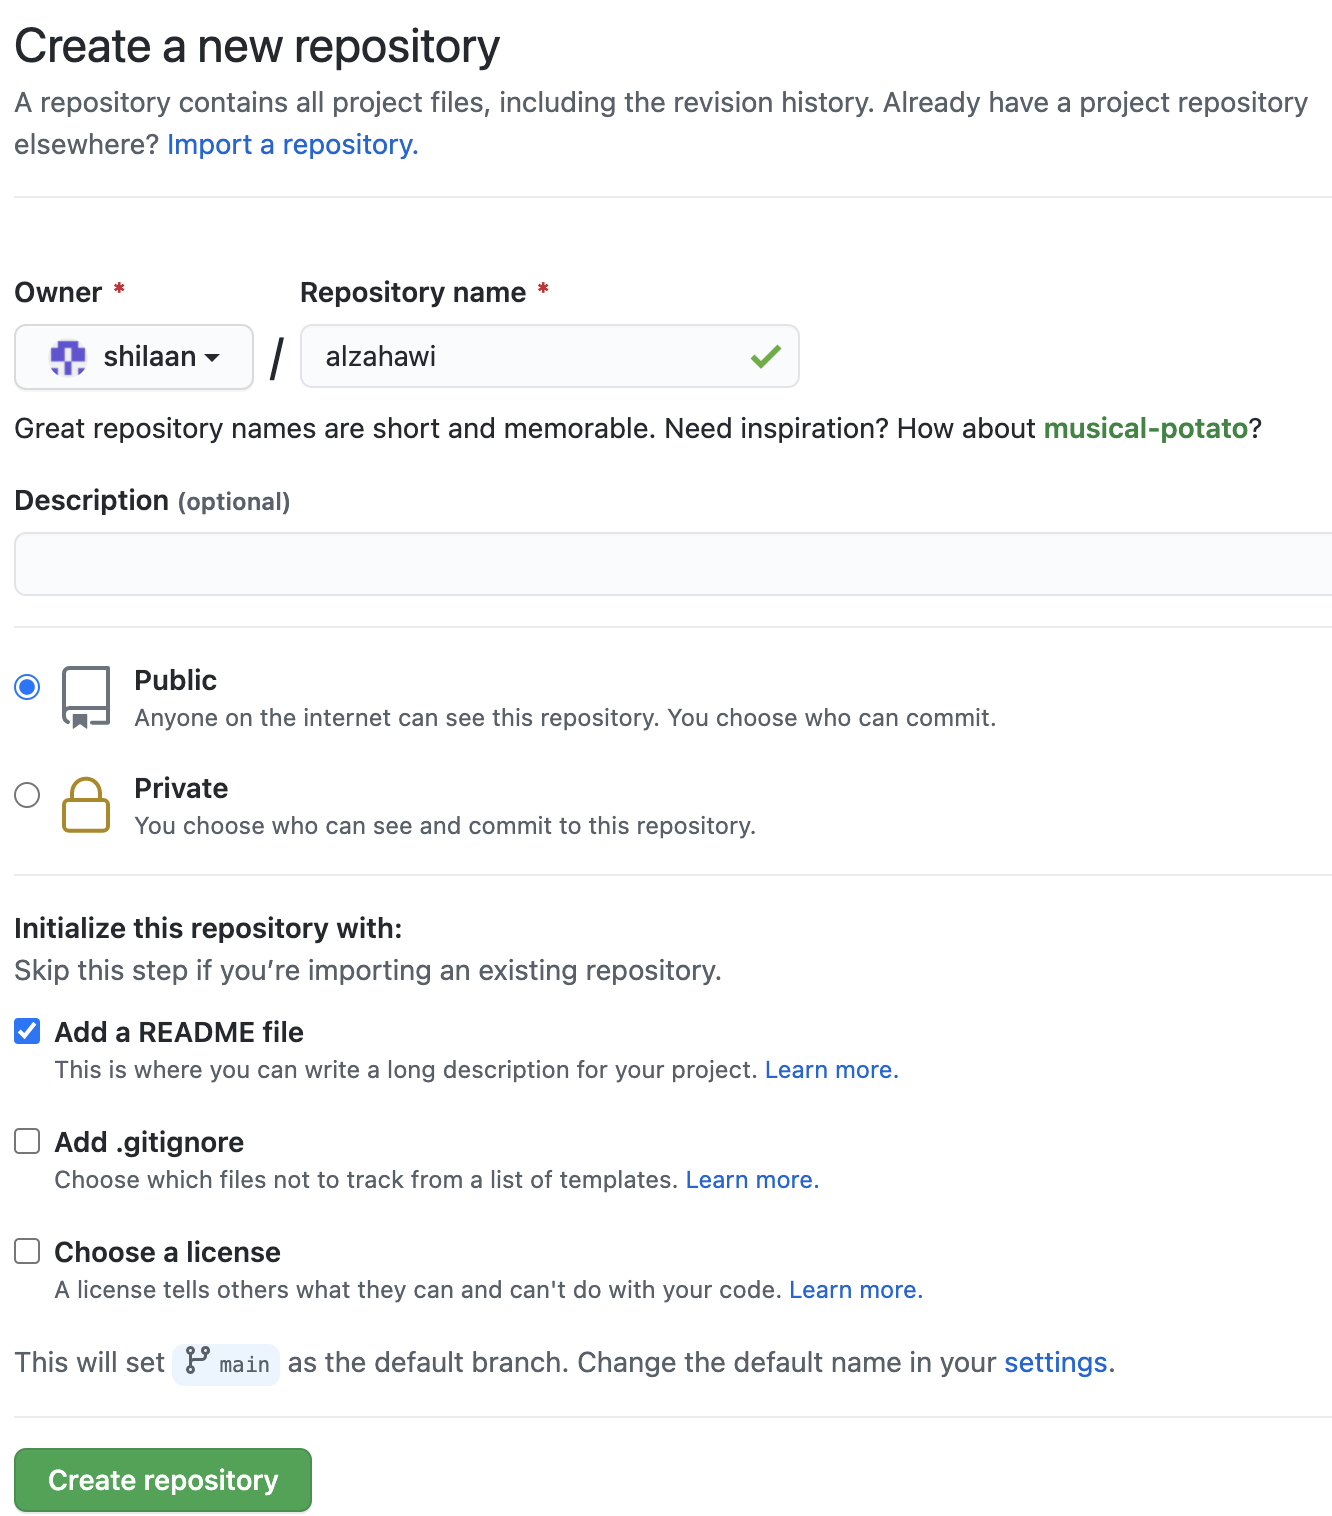
Step 1: Create GitHub repository
✓ Keep the repository
Public✓ Add a
README file✓ Do not add
.gitignoreClick to view screenshots for Step 1
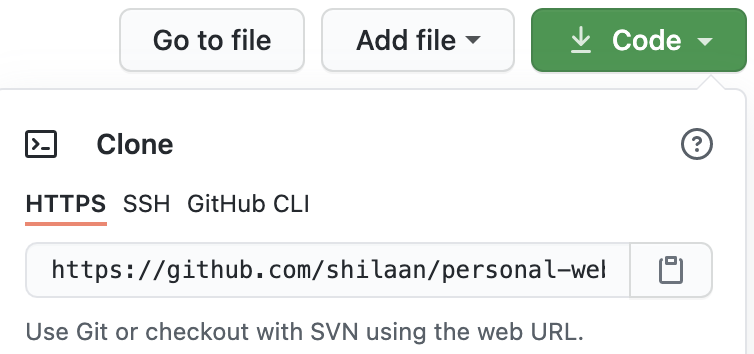
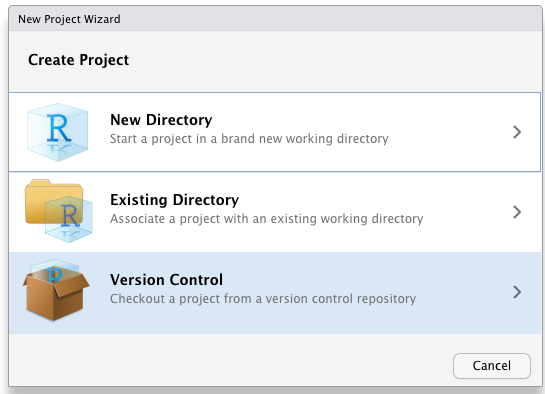
Step 2: Create project with Version Control in RStudio
☞︎ Go to https://github.com/your-username/your-repository
☞︎ Click on the green Code button
☞ Copy the HTTPS link to your clipboard
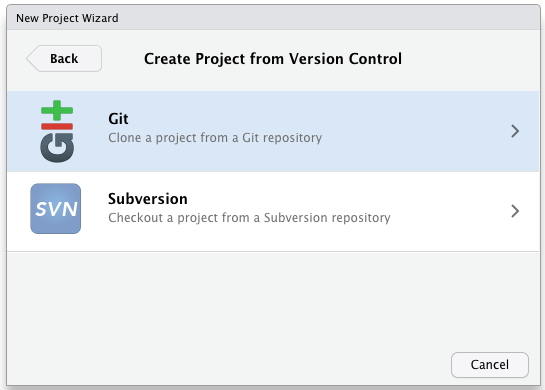
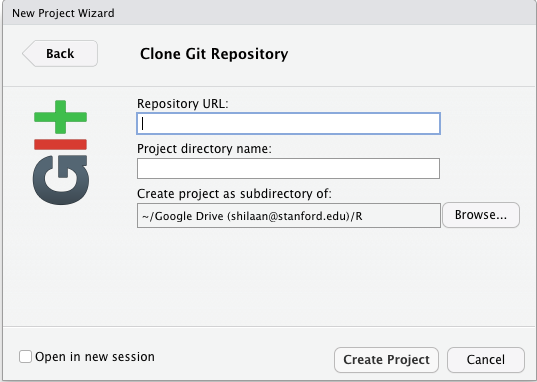
☞ Go to RStudio > File > New Project > Version Control > Git
☞︎︎ Copy paste the HTTPS link under Repository URL
☞ Click Create Poject
Click to view screenshots for Step 2
Step 3: Create website with {blogdown}
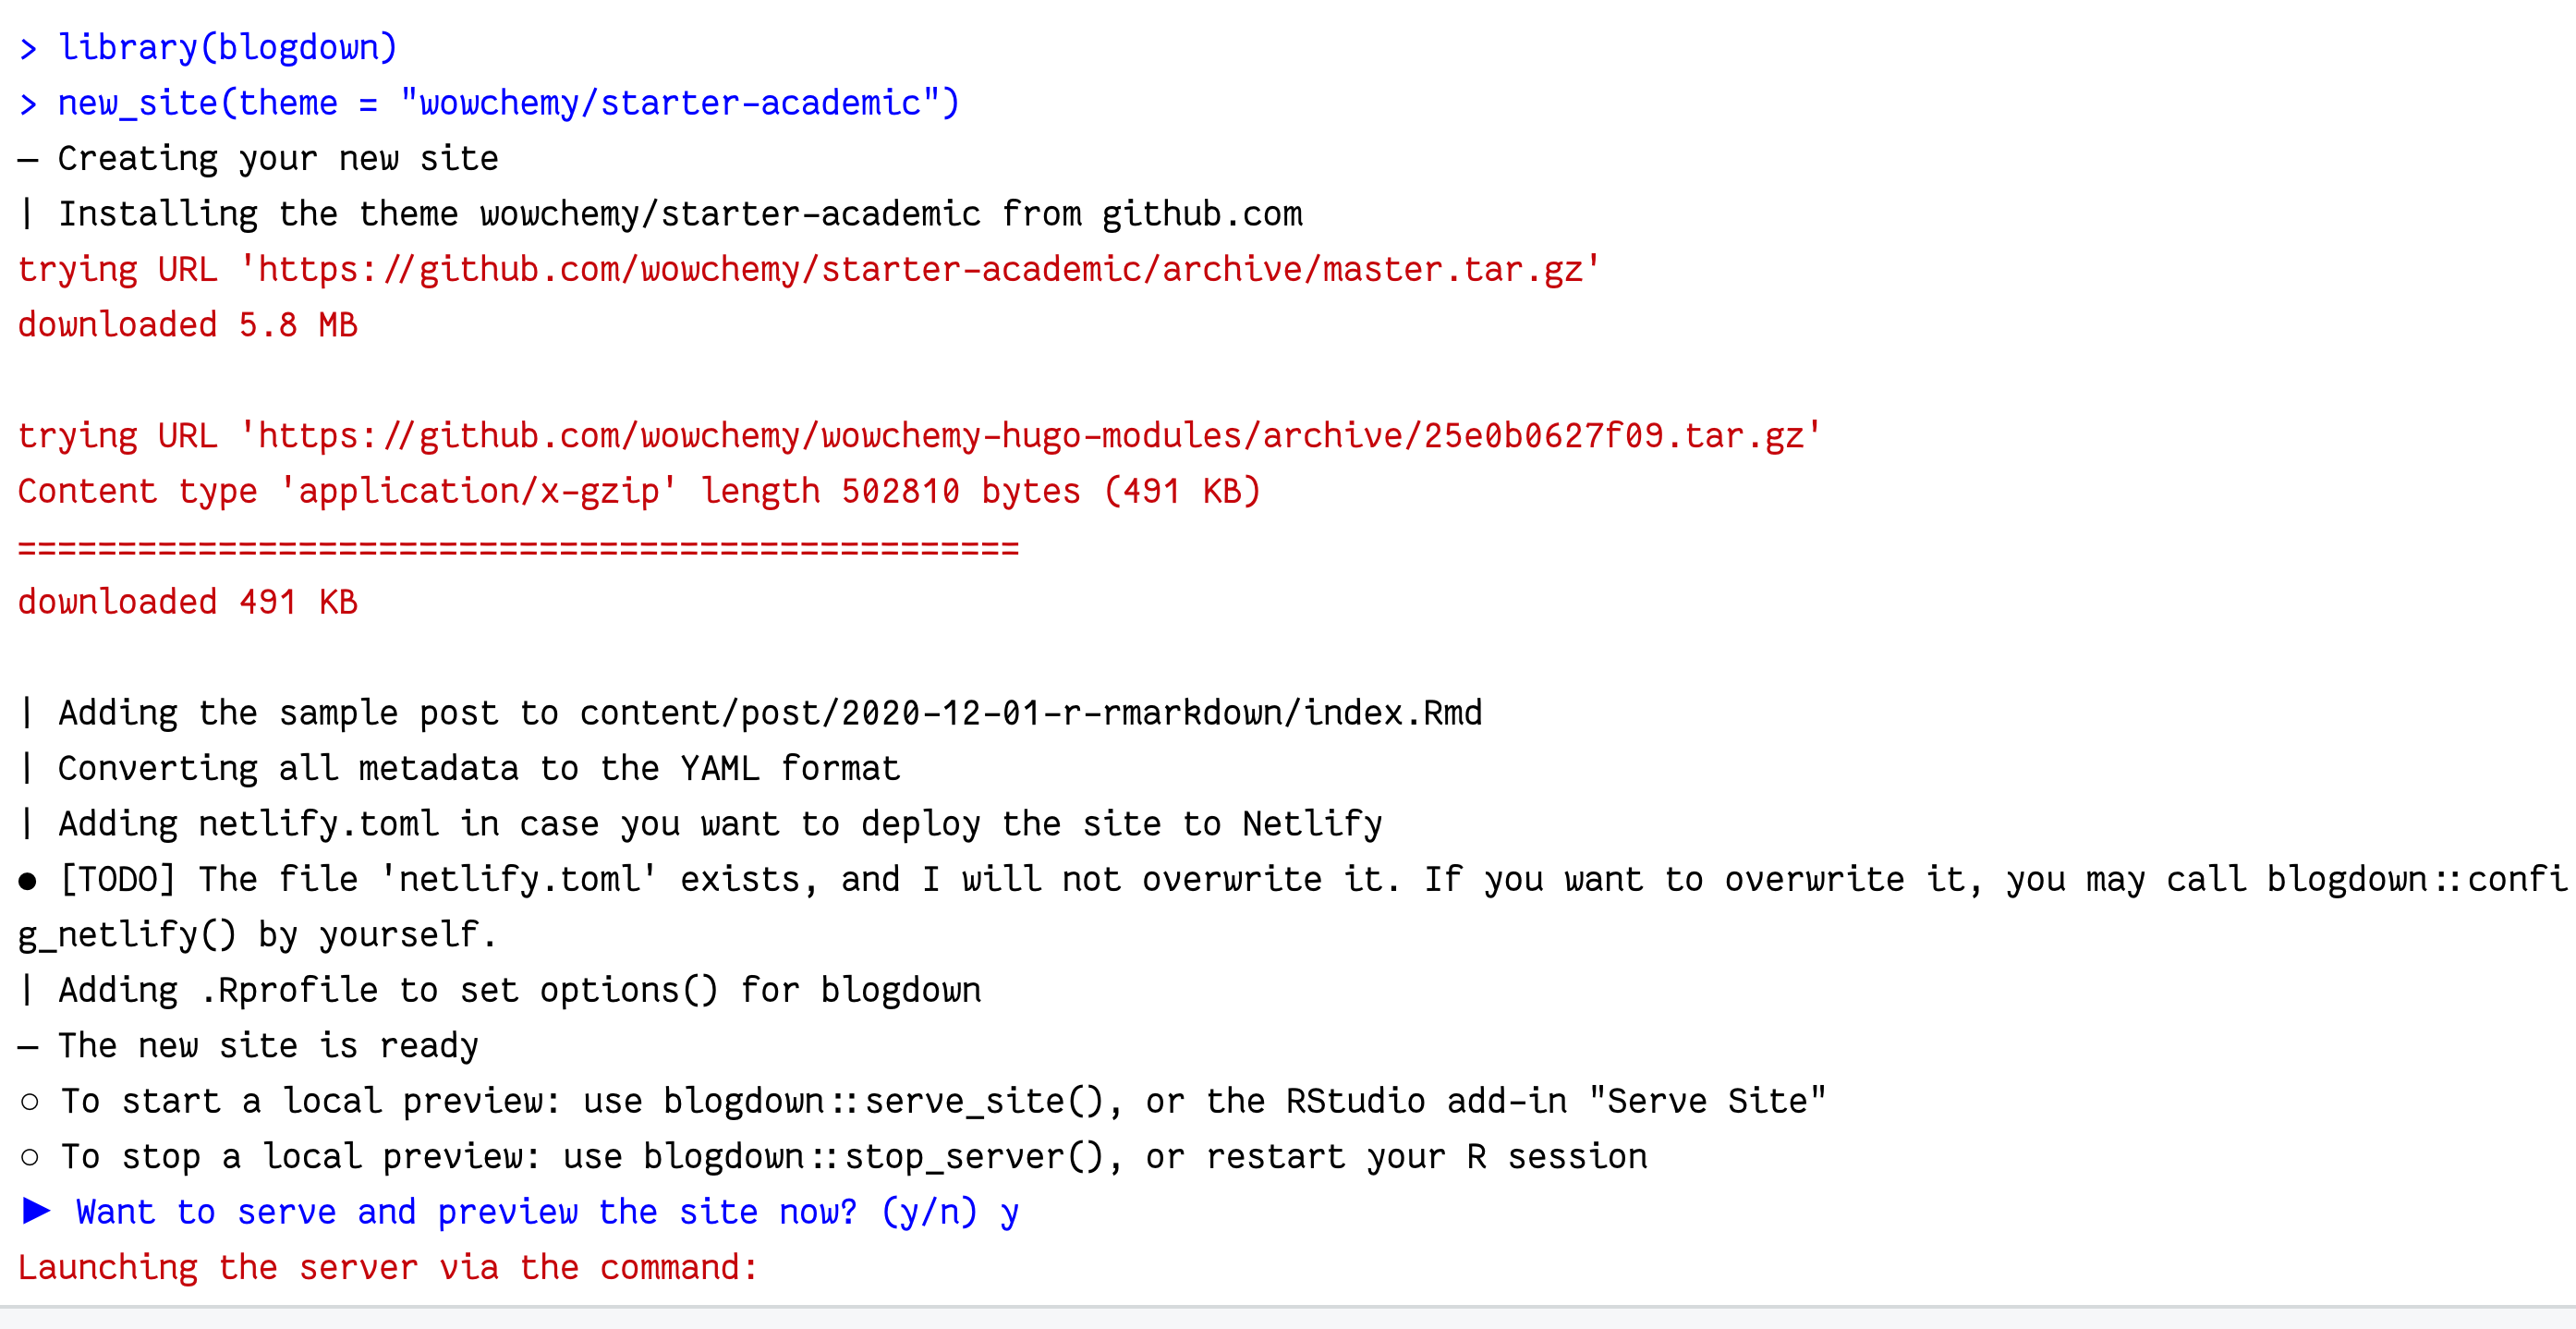
install.packages("blogdown") # install the blogdown package
library(blogdown) # load blogdown
new_site(theme = "wowchemy/starter-academic") # create your website!
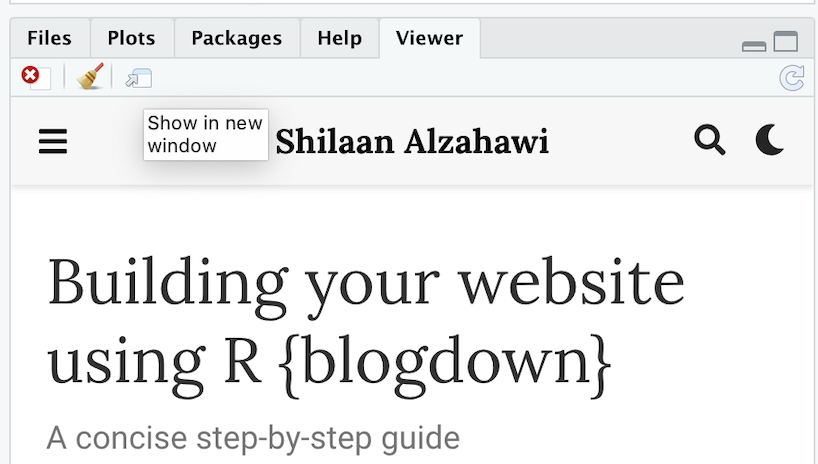
You will now be asked if you want to serve and preview the site locally (before publishing). Type y in your Console.

A preview will show up in your Viewer Pane. Click on the “Show in new window” icon next to the 🧹 to preview your site in a browser window.
Click to view screenshots for Step 3
Step 4: Push ⬆︎ to GitHub
In the console, run the following line of code to create a .gitignore file:
file.edit("gitignore")
Add the following lines to the .gitignore file:
.Rproj.user
.Rhistory
.RData
.Ruserdata
.DS_Store
Thumbs.db
Before we make our first commit, we use blogdown to check all our files:
blogdown::check_site()
This will give you a number of [TODO] items, like adding public and resources to the .gitignore file, which you can do safely. Don’t worry about content flagged as draft or files with a future publish date. If you have a [TODO] item related to your .Rprofile, run blogdown::config_Rprofile().
After running these checks, you’re ready to commit to GitHub! 🎉
Show me how to commit to GitHub
Environment Pane☞ Click on
Commit under Git☞ Check ☑︎ files to
Stage them☞ Write a commit message
☞
Commit and then Push ⬆︎Step 5: Deploy site with Netlify
After logging in to Netlify through GitHub, you can deploy2 your website and change the url to your preferred site name, as follows:
☞ Select New site from Git > Continuous Deployment: GitHub
☞ Select your website repository
☞ Deploy Site
☞ Settings > Site information > Change site name
Back in RStudio, change the baseurl to your new link in your configuration file:
install.packages("rstudioapi")
library(rstudioapi) # to easily navigate to files
rstudioapi::navigateToFile("config.yaml")
In config.yaml, set the following:
baseurl: 'http://your-site-name.netlify.app' # use the link you just created
Before committing, let’s again run
blogdown::check_site() # checks to resolve critical [TODOs] before commit
Among other things, you need to make sure that the version of Hugo that you are using locally with {blogdown} matches the version used by Netlify (which is specified in netlify.toml). You will likely need to change your netlify.toml file. Remember that you can easily navigate to this file using
rstudioapi::navigateToFile("netlify.toml")
Step 6: Customize your site with Wowchemy 🎨
It’s time to customize! ❤︎

Personal information
First, we’ll edit the About information (called a widget) on your homepage.
rstudioapi::navigateToFile("content/authors/admin/_index.md")
☞ Fill in the _index.md with your personal information (find mine here)
☞ Personalize with desired icons
☞ Add your picture called avatar.jpg to the content/authors/admin/ folder
To change (or remove) the title of your About widget,
rstudioapi::navigateToFile("content/home/about.md")
set title: My new title
Show me what a personalized page looks like
The about page:
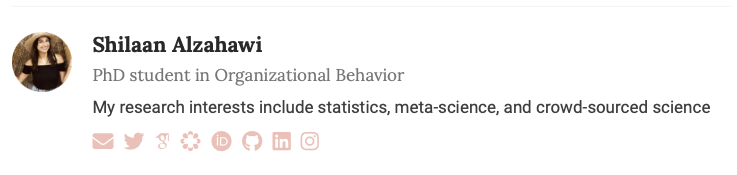
 The shortened
 bio (appears under your blogposts):
Widgets
To get rid of and rename the other widgets on your homepage,
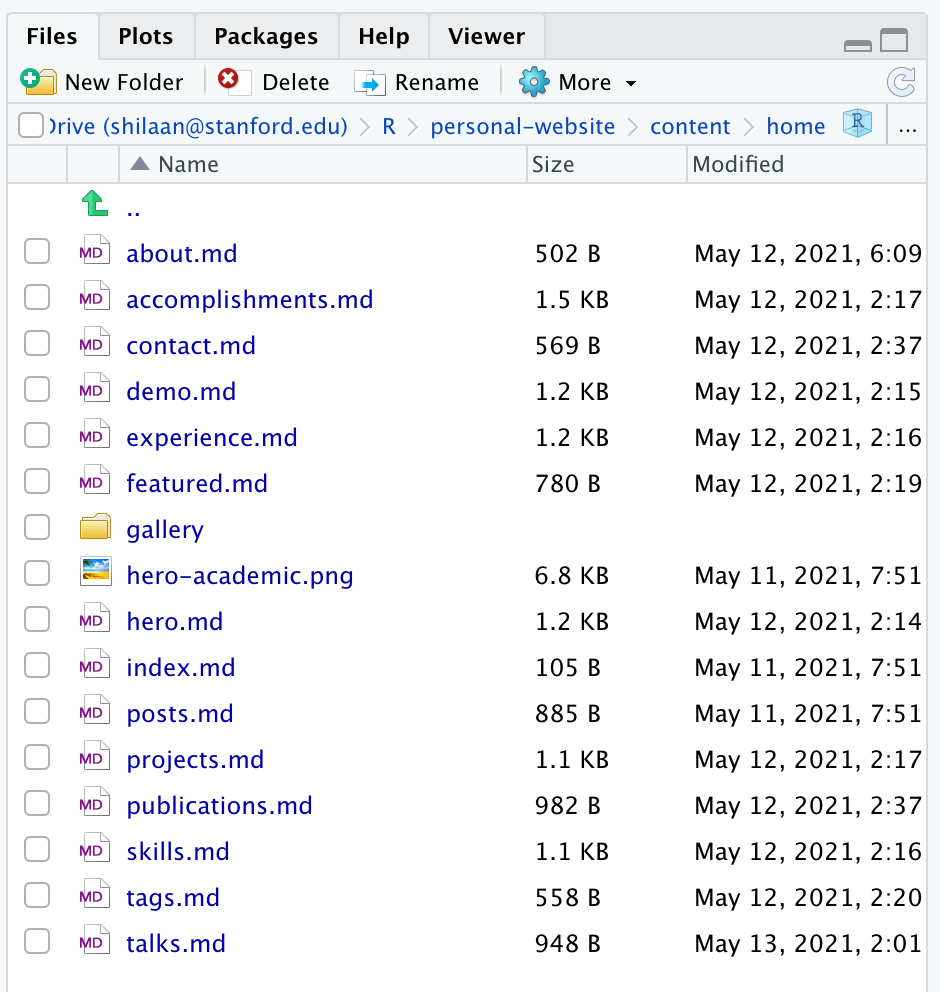
☞ Go to the Files tab on your Viewer pane
☞ Open the .md of a widget you wish to deactivate, e.g. hero.md 3
☞ Write active:false
☞ Change titles to your liking with title: My new title
☞ Repeat for all other widges you wish to deactivate or personalize
I wanted to start with a pretty minimal webpage, so I deactivated all widgets except for about.md and posts.md.
Click to view a screenshot for this step
Menu
Now that you’ve deactivated some widgets, you’ll no longer want to link to them in your main menu (the navigation bar at the top).
Customize your main menu in config/_default/menus.yaml
rstudioapi::navigateToFile("config/_default/menus.yaml")
☞ name: My new name to change the name of your menu items
☞ Remove the links to widgets that you deactivated (here’s my menus.yaml)
Theme
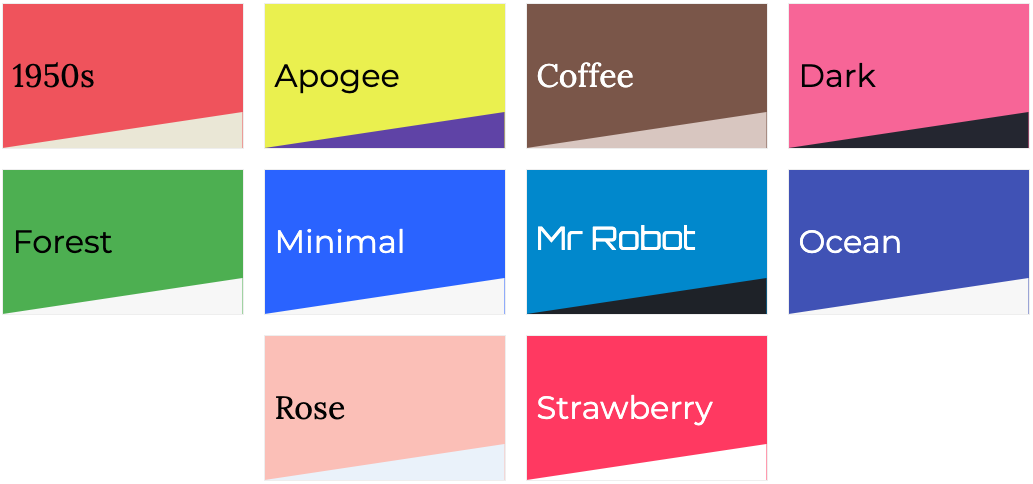
☞ Pick a built-in Wowchemy color theme
☞ rstudioapi::navigateToFile("config/_default/params.yaml")
☞ Set theme: rose (or whichever your chosen theme is; no capitalization)
I initially chose the Rose theme, but decided I wanted to further customize the color theme using the steps outlined here:
☑︎ I located the rose.toml file4
☑︎ I created a new data/themes/ folder at the root of my site
☑︎ I copied the rose.toml file into data/themes/shilaan_theme.toml
☑︎ I adjusted the colors as desired using HTML color codes
☑︎ I set theme: shilaan_theme in config/_default/params.yaml
You can also customize the font set.
Show example GitHub files for creating my own theme
Website icon
By default, your website will be published with the Wowchemy icon in the web browser tab. For example:
![]()
To get your own Website icon, save a square 512x512 pixel image named icon.png in your root assets/media/ folder. My webpage should now show up in your Browser like this: ![]()
I followed the steps but my Website icon hasn’t changed
I ran into this issue. Simply clear your website from your browser history. 🧼 I didn’t realize the problem was caused by my cache until finding this issue.
Step 7: Write your first post ✍
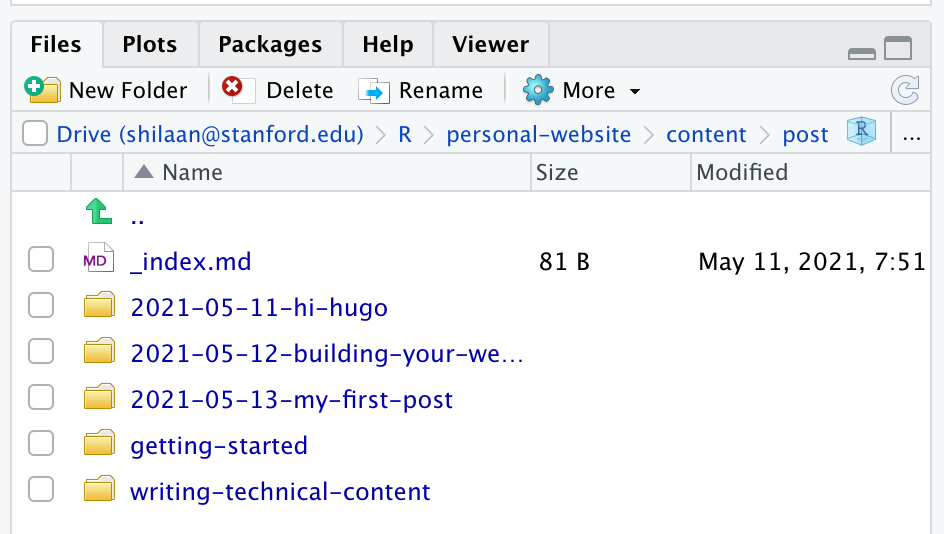
To remove the example posts currently populating your website (e.g., Welcome to Wowchemy, the website builder for Hugo), navigate to content/post and remove the folders associated with them (in this case, the getting-started folder).
If you find these posts helpful, you can always take another look at them on the Demo site and find their underlying files at themes/starter-academic/exampleSite/content/post.
If you really want to keep these files on hand, you can save them as a draft so that they don’t publish on your site anymore. You will still see them in your preview when you serve your site locally. For example:
rstudioapi::navigateToFile("content/post/getting-started/index.md")
Now, set draft:true in the front matter. From now on, whenever you run blogdown::check_site(), you will be reminded that you have these files marked as drafts.
We’re ready to write!

In your console, type
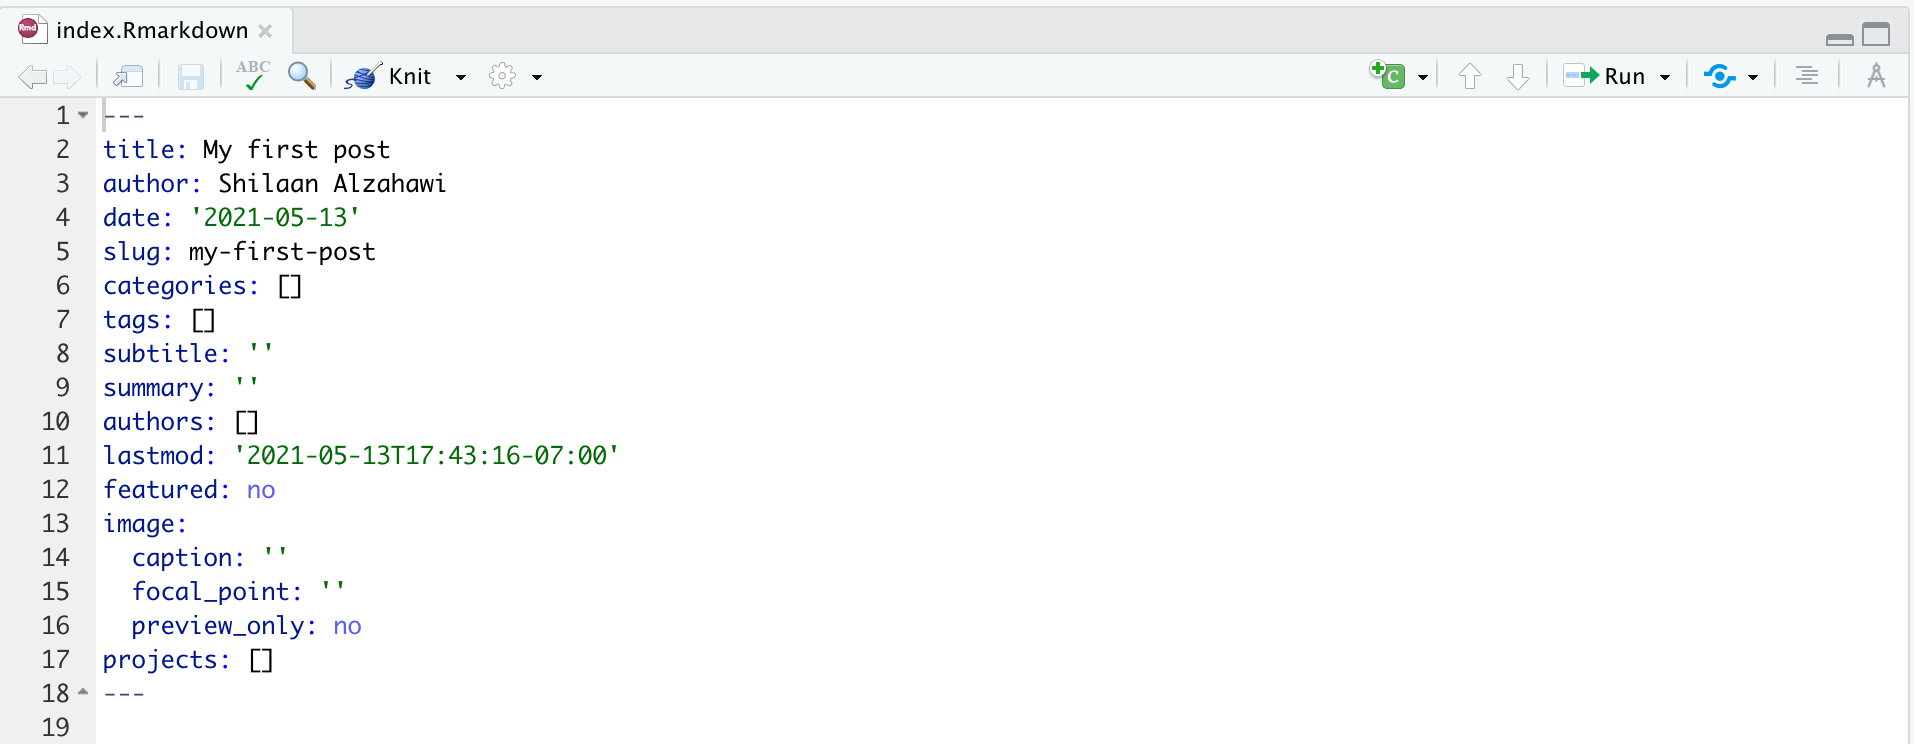
blogdown::new_post(
  title = "My first post",
  ext = '.Rmarkdown',
  subdir = "post"
  )
In your Files pane, you will now have a folder (under content/post) with today’s date and the title of your post. The crucial file is index.Rmarkdown: this is where you will write your post.
Go ahead and open index.Rmarkdown. When you knit this5, your website will preview in the Viewer pane. Remember that you can click on the
“Show in new window” icon next to the 🧹 to preview your site in a browser window.
index.Rmarkdown file, not the index.markdown file. The markdown file is automatically created and updated when you knit your Rmarkdown.Go ahead and add an R code chunk:
```{r echo=FALSE}
library(ggplot2)

x = seq(-1, 1, .01)
y = sin(x^3)/(1 + x^6)

ggplot(aes(x = x, y = y)) +
geom_line() +
geom_ribbon(
  aes(ymin = 0, ymax = y),
  fill = "pink",
  alpha = 0.5
  ) +
theme_void()
```
Knit your Rmarkdown. Check out what it looks like, write your own content, and push⬆︎ to GitHub when you’re ready. Don’t forget about the option to run blogdown::check_site().
Show me screenshots of this step
We’re done! 💪

I hope this was helpful! Feel free to leave a comment
Acknowledgements
My workflow, and a large part of the content of this post, is based on Alison Hill’s materials. In addition, I would not have made this website if it wasn’t for Daniël Lakens friendly nudging me (about 5 months ago… it took me a while to accept my fate). Thank you, Alison and Daniël! 🙏
Thank you to Ari Dyckovsky for suggesting this addition to the post ↩︎
Continuous deployment ensures that your website is rebuilt every time you push⬆︎ to GitHub. ↩︎
The
herowidget is the top blue pane that introduces Hugo Academic Starter ↩︎Themes are in
themes/github/com/wowchemy/wowchemy-hugo-modules/wowchemy/data. In this folder, go to/fontsfor font sets and tothemesfor color themes. ↩︎Use either the Knit button,
command + shift + kon Mac, orcontrol + shift + kon Windows/Linux. ↩︎
Shilaan Alzahawi
PhD candidate in Organizational Behavior
My research interests include leadership, team science, and open science